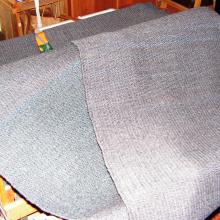
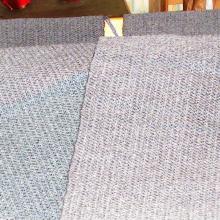
The Garment
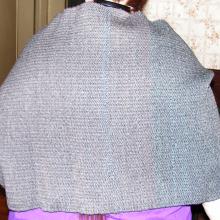
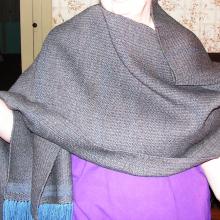
Shawls date to at least the early Egyptian period. Over the years they have been made in various shapes and sizes, depending on their use. In our period, shawls were used as both head covers, as veils, or as wraps. Traditional shapes were either triangular or rectangular. They are know from Norse tapestries dating to the period of the Oseberg Ship and can be seen in various paintings and illuminations throughout the Medieval Period.
Weaving has a history that stretches back over many thousands of years. The earliest evidence of weaving comes from a Neolithic village in Turkey and date from 7160 to 6150 B.C.E. Various types of looms were developed at the same time as weaving. As weaving became more complex, so did the looms that were used.
According to Jennifer C. Ward, in her book, Women in England in the Middle Ages, horizontal treadle loom was introduced to North-west Europe in the 11th century. The earliest pictorial evidence we have of this is from a 12th century English manuscript that clearly shows a weaver at a horizontal treadle loom.
The Weave
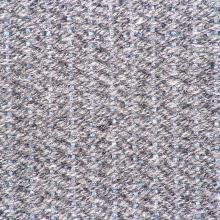
While the earliest weaving is basket weave or plain weave, twill weaving has been known for over 1000 years. Some of the earliest examples of twill weaves are from the textiles found on the Oseberg Ship in Norway. These fragments have been dated to 835 C.E. and include both the “standard” 2/1 twill as well as variants on it. These variants include Diamond, Herringbone and broken twills. What makes broken twills different from regular twills is that they do not show the regular repetitive patterns of the interaction between the warp and the weft. Broken twills have probably been known since discovery of twill patterns in general.
The Tools Used
In creating this garment, I used primarily modern materials and tools. First, the yarn for this project was purchased. This is not in itself un-period as weaving and spinning were considered two different crafts, and it took between 7 and 10 spinners to keep one weaver supplied in yarn. While I do know how to spin, the purpose of this project is to create a finished garment in a reasonable time frame.
Second, the loom I used is a modern jack treadle loom. While treadle looms are period, they were usually counter-balance looms, which used a series of pulleys and ropes to raise and lower opposing shafts to create a shed. When you depress the treadle on a jack loom, it closes a scissor jack, thereby pushing the desired shafts up to open the shed. Rope and pulley treadle looms, including the counter-balance loom, are still used today, but I do not have access to one, nor do I have the space to keep it in my studio.
I also used modern metal heddles for most of this piece as opposed to the string heddles that would have been more common in period. I did have to tie several heddles to fix some threading errors, and I am completely conversant with how to tie string heddles when they are needed. Again, this is a function of the type of loom that this weaver has available.
The stick shuttle and reed I used were correct to the period of this piece.
Planning a Weaving Project
Once you have decided what you want to weave, including the colors, yarn, weave structure, finishing techniques, and size, the hard part starts, the math. Part of being able to plan any weaving project is being able to perform the calculations without which you can’t be sure you are going to weave what you are trying to.
Yarn Calculations
The warp calculation is based on the overall length and width of the piece being woven. There are two figures you need for these calculations. The first is the sett, or the number of ends per inch (EPI) of width. While there are several ways of determining sett, the easiest is to take your warp yarn and see how many times you can wrap it around a ruler in one inch. This give you wraps per inch (WPI). This is actually a standard measurement of weaving yarns. Half this number is the sett or the EPI. The second number you need is the overall length. This is not nearly as straight forward as it sounds.
The overall length is based on several other numbers: These include:
- The finished length of the piece being woven,
- Plus 10% for take-up (the loss of length due to bending around the weft)
- Plus 10% for shrinkage (if needed, check fiber content)
- Plus loom waste (the amount of warp that is unweavable at the beginning and end of the warp)
- Plus the length of any fringe you may need, if it is longer than the loom waste.
- Times the total number of ends
Once you have all these numbers, it is just a matter of addition and multiplication. The numbers for this project will be in the table below.
The second yarn calculation is to determine the amount of weft you need. To do this, you need the following numbers:
- The finished width of the piece being woven,
- Plus 10% for take up
- Plus 10% for shrinkage (if needed, check fiber content)
- Times the total number of picks, or weft throws, which is the same as the sett in balanced weaves, per inch.
Please note that I attempted to include the spreadsheet showing the yarn calculations for this project, but was unable to copy the spreadsheet into this textbox.
Starting to Weave.
After you have done all the math and gathered your materials, as the weaver you begin the process of actually weaving your article. This takes several steps which are described below. Note that all these steps have to be performed correctly and in order to successfully weave the item you have planned.
Step 1 -- Winding the Warp
As we determined in the math section above, we need 160 warp threads at 173 inches, or 4.6 yards each. For ease of winding this will usually be rounded up to 5 yards per thread. Using whatever method you desire, you need to measure these threads without letting them get tangled up. The method I usually use is a warping board, you can also use a warping mill, or you can go low tech and just use three pegs that are held upright and stable.
All three of these methods have two critical things in common. They keep the measured yarn under tension and they can hold a cross, which keeps the individual threads in order. When using warping board or the warping mill, the exact length of the warp is controlled by the path taken around the pegs or bars. For the pegs, you just have to anchor them the correct distance apart. After you have wound the warp, you put ties to hold the cross, usually five, and then choke ties at regular intervals down the warp. When this is done, you can take the warp of the warping tools and move it to the loom. This is the first really dangerous place for moving the warp. If you lose control of it, you can end up with a yard football.
Step 2 – Dressing the Loom
There are several steps to dressing a loom. Each of the really cannot be interrupted once you start, so stretch, relieve yourself, and get something to drink before you start each step. The method I am using to dress my loom is called front to back (f2b) which means that month the warp from the breast beam, through the reed, to the heddles, tie it to the warp beam, and mount the warp. The other method is called back to front (b2f) which requires that the warp be wound onto the warp beam first, then treaded through the heddles, taken through the reed, and tied off on the cloth beam. As both finish with a warp mounted on the loom, it really doesn’t matter which method you use. For most weavers it is a matter of habit. I use front to back as that is the first way I learned to do it.
Step 2.1 – Treading the Reed.
Threading the reed is the second place you can lose control of your warp. So you need to be very care during this step. The reed is the part of the loom that keeps the warp organized and in order. Reeds come in multiple sizes, chosen by the size of the yarn you are using for you warp, To insert the warp through the reed, you take each warp thread and insert in through one of the opening, or dents, of the reed. In this project, I had one warp per dent. I have seen patterns that had up to 5 warps per dent. For the best outcomes, it is best to thread the entire reed in one sitting.
Step 2.2 – Threading the Heddles
The heddles are the part of the loom that controls which warp threads are raised. Each warp goes through one heddle, which is attached on one shaft. The order of the shafts that the warp is threaded through in conjunction with which treadle each shaft is tied to determines the designs that can be woven into the piece you are weaving..
Step 2.3 – Tying onto the Warp Beam
This step begins the process of tensioning the warp. Tensioning is important because maintaining balanced tension across the warp is what allows the final product to be even. Tying on involves taking a section of warp, I usually use one inch bouts, straightening the ends, and tying them evenly across the width of the back beam.
Step 2.4 – Beaming the Warp
This step entails winding the warp onto the warp beam. Ideally, this is done by two people, one maintaining tension on the warp and the other winding it on the beam and managing the warp dividers (dividers placed in the warp to keep it from packing to tightly). It can be done with one person using a process called “crank and yank”, where you crank on one turn of warp and them you yank the warp to tension it. You do this until you have most of the warp on the warp beam. You want enough left on the far side of the reed to tie onto the cloth beam and do the final tensioning.
Step 2.5 – Tying on the Cloth Beam
After you have wound on the warp, you need to tie it on the front, or cloth, beam. This is the final step of the tensioning process, so again it is fairly critical. First, look at your ends. If they are not fairly close to even, you probably have a tensioning problem, The only way I have found to fix this is to unwind the warp from the back beam and re-wind it, paying more attention to the tension as you wind it on. When you ends are even, take the same bouts as you used when tying onto the warp beam and tie them loosely onto the cloth beam. One you have the all tied on, loosen or tighten the knots as necessary to achieve an even tension across the warp. Once you have even tension, tie the knots tightly enough that they won’t slip.
Step 2.6 – Tying up the Treadles
Treadles are the means of raising or lowering the shafts of the loom. This step is the process of connecting each shaft to one or more treadles, which in turn informs the design you are weaving into your piece. For plain, or basket, weave, you want help of the ends to be raised with one treadle and the other half to be raised with the other. For a balanced 2/2 twill, like the weave of denim, you would need at least four shafts with the treadles tied up as 1&2/2&3/3&4/4&1. As this piece is broken twill, I had it tied up as 1&2/3&4/2&3/4&1. While the former shows the nice diagonals seen in denim, the later, while still a twill, does not show those clear pattern lines.
Congratulations! Steps one and two represent eight hours of this project.
Step 3 – Weaving the Project
In this step we actually weave the project by stepping on a treadle and throwing a shuttle holdig the weft yarn through the shed, or opening between the raised and lowered warps. Between each throw, you pack the weft by firming pulling the beater bar, which holds the reed, against the newly placed weft.
Step 4 – Finish the Project
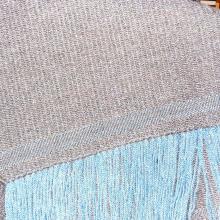
When you have finished weaving your project, this step is removing your weaving from the loom. What I did for this piece was cut the warp and tie a warp fringe. I then unwound the cloth from the cloth bean and did the same to that end. Normally, you would then trim the fringe on each end to match, although on this project, the person I’m making it for wanted to do that part herself. There are a variety of other ways to finish your warp ends.
Step 5 – Wet Finishing
Wet finishing is washing your newly finished piece. This serves to lock the weaving together, allowing it to become a firmly joined piece of cloth. I personally do the by washing it in the temperature recommended by the yarn maker and then drying it flat. This allows me to do some blocking if it is needed, although it was not for this piece.
Conclusion
This is just a brief overview of weaving and the piece I wove for a Lady in Oertha. Each piece I weave teaches me more about this craft I have followed for about 15 years now. As I continue my journey as a weaver, I am continuing to discover more areas to explore in this vocation that has claimed me. In addition to improving my skills in multishaft weaving, I have also begun to study weaving on various types of frame looms and am beginning to look at tapestry.
Fenly, Leigh, “Discovery and study of ancient fabrics provide clues to life in ages past” accessed online at http://www.archaeologynews.org/link.asp?ID=19703&Title=THREADS%20of%20old on April 8th, 2007]
Gale Encyclopedia of Science. Vol. 6 http://science.jrank.org/pages/6777/Textiles-History-textiles.html. Textiles - History Of Textiles</a>
Ward, Jennifer, C. Women in England in the Middle Ages. Continuum International Publishing Group, 2006. pg 90.
www.forest.gen.nz/medieval/articles/Oseberg/textiles/textiles.htm
www.fashion-era.com/ancient_costume/egyptian_fancy_dress_3_shawl_draper…
Ingstad, Anne S., The Textiles in the Oseberg ship, accessed online at http://www.forest.gen.nz/Medieval/articles/Oseberg/textiles/TEXTILE.HTM. On September 22, 2020

